
In todays blog we will see how to bundle a React application into a single HTML file which can be used for production, in our case we will use the finished file to view the React application in CRM.
To show how to bundle a react application we will create a template react application and we will use Gulp to bundle all the code in a single HTML file. First off , what is Gulp? Well, for those wondering Gulp is a tool from open source community used for automating repetitive tasks in web development.
To do this development we can separate it into 3 steps :
1. Create a new React application in your local computer (either JavaScript or TypeScript template, it doesn’t matter because we won’t edit the react app for this example)
2. Build the React app for production than create the final bundle HTML file using Gulp.
3. Create a custom HTML web resource and the entity, tab, field or pop-up where you want to show the final HTML file. (I choose to show it in a IFrame inside a tab in a custom entity but feel free to choose whatever you like).
Step 1: Create a new React application locally
First, we need to create the React application that we want to then show in CRM , to do that follow the steps below:
1) Create a local empty file on your computer and copy that path of the file
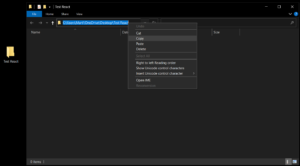
2) Open Command Prompt and paste the file directory, in this file we will save the React app that we will create using Node.js
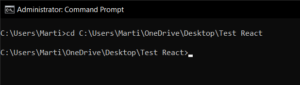
To direct the terminal to the directory you want, all you have to do is this :
...> cd *paste the folder path*
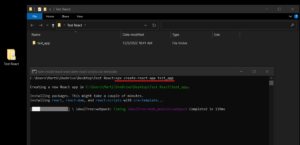
Now by using Node and npm we will create the app using build in commands:
path...> npx create-react-app *name of the app* --template typescript/javascript
Note : The ‘–template’ part in the command above is only added when we want to have our project in typescript , you don’t have to add it for javascript because javascript is the default choice but I left it in the above example just to explain what it does. As seen below I haven’t included the template part and my project is being created, if I open the project then the code is in javascript.
After the project finishes, we can send our cmd directory inside the created file project and then we can use the command below to run the code locally and see what the project looks like in real-time:
path...> npm start
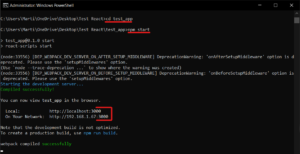
After the ‘compiled successfully’ shows up, now we can copy one of the URL shown above and paste them in one of our browsers to see what our project looks like, but remember don’t close the CMD window after the step above because the CMD makes it possible for the project to stay open kind off like a server.
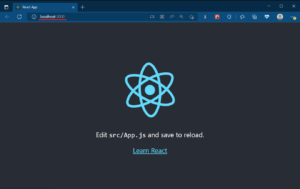
As seen above that is how the template of a newly created application looks like, now we can open the project in Visual Studio Code and do changes if we want to but for this example I won’t change anything, lets build and import it just like it is in CRM.
Step 2. Build the React app for production than create the final bundle HTML file using Gulp
Now what we have to do is build the project for production then create the final HTML file using Gulp, but before that we need to add a few things to our project that Gulp needs to work:
1) First, we need to install Gulp using NPM
path...> npm install --save-dev gulp gulp-inline-source gulp-replace
2) Next, we have to create an .env file in your project root folder and set the following environment variables to disable source maps.
  INLINE_RUNTIME_CHUNK = false
  GENERATE_SOURCEMAP = false
  SKIP_PREFLIGHT_CHECK = true
3) Next, create a gulpfile.js file in the root folder which will contain the code below :
  const gulp = require('gulp');
  const inlinesource = require('gulp-inline-source');
  const replace = require('gulp-replace');

  gulp.task('default', () => {
    return gulp
      .src('./build/*.html')
      .pipe(replace('.js"></script>', '.js" inline></script>'))
      .pipe(replace('rel="stylesheet">', 'rel="stylesheet" inline>'))
      .pipe(
         inlinesource({
           compress: false,
           ignore: ['png'],
         })
       )
       .pipe(gulp.dest('./build'));
    });
The gulp.task above will add the inline attribute to the <script> and the <link> tags. The inlinesource module will read these inline attributes in the html file and replace them with the actual content of the corresponding files. I know this is a bit confusing but to simplify it, what this code does is that it gets all the JavaScript code after the build and adds it as part of the HTML in a <script> tag and all the CSS styling in a <style> tag.
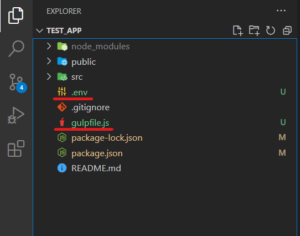
After following all the steps until now then the project folder should look like this :
Now we have to build the project for production as shown below:
path...> npm run build
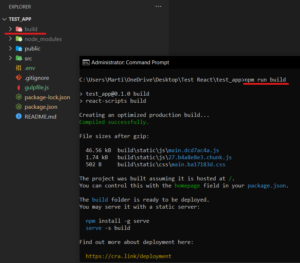
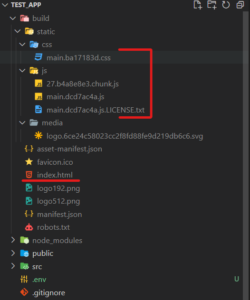
As seen above after running the command a new file named build is created, this file contains all the files needed to pass the app in a production environment but here’s the problem with it. Before the build the folder structure looks like this:
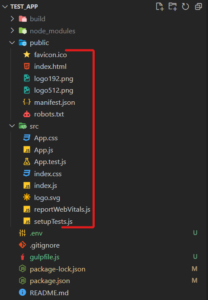
All these files are needed in the project, let’s say we want to create our own custom app then there will probably be even more files and components, after building the project the file structure in the build file looks like this:
So basically to make it work in production we need to add the CSS, JS and HTML together as shown in the folders above, well this might work depending on what type of environment or where you run the app but in our case it’s a lot of work to have the JS, CSS and HTML in separate files because we then have to create web resources for each of them and make it possible to call each other or connect somehow, but by using Gulp and having it in a single file we only have to create one single web resource and we can deploy it in CRM, that way we can even manage the app easily.
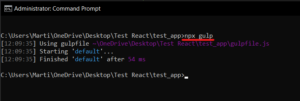
Now let’s run Gulp and see what it does. After the npm run build command we run the command shown below:
path...> npx gulp
Before running the command let’s see what the index.html file from the build folder looks like :

So it only contains plain HTML and nothing else , now let’s run the gulp command and see what happens to this file:
Now if we open the HTML file we will see that it’s content has changed:
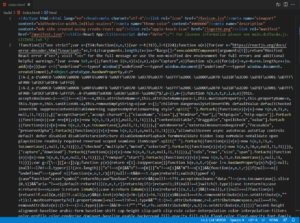
All the code under the HTML is the JavaScript and CSS but they are minified, with this we can say that our final HTML file is created, now we can get the code inside this HTML file and use it CRM.
Step 3. Create a custom HTML web resource and the entity/tab/field or pop-up where you want to show the final HTML file.
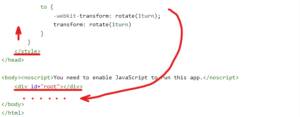
First let’s create the HTML web resource and upload the code from the final index.html file but before we upload the code we have to address a small problem, when the gulp file builds the HTML file the <script> tag is before the <div id=”root”> and if we get the code just like it is it won’t work because the div with id= ‘root’ is the main div were the React app renders everything build in the project, so to fix this go to google and search unimify code and all you have to do is have the <div id=”root”> before the <script> and <style> tags
Now after making this change to the code, let’s copy it and create the HTML web resource in CRM:
After that we can add the web resource to the main form of an entity in a field, pop-up or IFrame etc, I’ll add it in an IFrame and the IFrame in a new tab on the form:
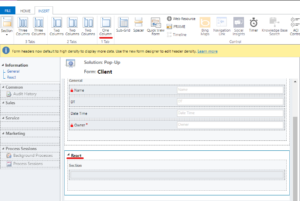
As seen above I created a new tab and I labeled it as React , now inside this tab let’s add our web resource :
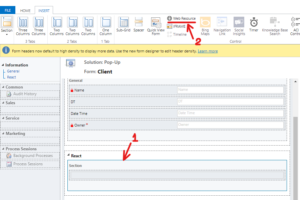
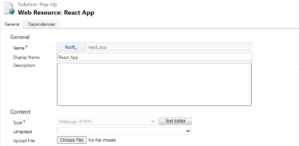
So as seen in the picture above click inside the created tab and then click on Web Resource , this is a build-in shortcut by Microsoft were you can directly create an IFrame that has an web resource attached to it. After clicking on the web resource button, the pop-up shown below will open up :

On this pop-up we specify which web resource we want to open on the IFrame, also we can specify other things like labels, custom parameters and on the formatting tab up top we can change the size of the Iframe etc. After modifying it as you like click save then publish and let’s go see how everything came together.
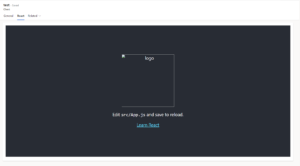
As we can see above our React template app shows up if we click on the React tab we can see our app inside the IFrame, weirdly the default logo didn’t load and I think it’s CRMs fault that this happens but since this is only a tutorial on how to add an React app on CRM then we can overlook this little issue because it doesn’t really matter.
Thank you for reading until now, feel free to delete the template and load your own custom React projects in CRM using this way of bundling 🙂