In order to make a responsive sorting header you will need to start by creating a gallery with your desired content. For my example we will be using a simple three column table: First Name, Last Name, and ID.
Table(

{

'First Name':"Allan",

'Last Name':"Brooks",

ID:Rand()*100000000

},

{

'First Name':"Brian",

'Last Name':"Walker",

ID:Rand()*100000000

},

{

'First Name':"Royce",

'Last Name':"Adams",

ID:Rand()*100000000

},

{

'First Name':"Adam",

'Last Name':"Stuart",

ID:Rand()*100000000

},

{

'First Name':"Roy",

'Last Name':"Kirk",

ID:Rand()*100000000

}

)
When designing the header we will use a horizontal container. Inside , create individual containers for each column header. Inside each container, include a Label to display the column name, an Icon for sorting order and another icon to indicate selectabilty.
Set the fill property of the Label to change based on the storing column currently selected.
If(SortingColumn=Self.Text,RGBA(50, 59, 50, 0.1),RGBA(50, 59, 50, 0)))

For the icon that handles the sorting order, set the visibility based on the sorting column selected and change the icon based on the order (ascending or descending)
If(AscendingOrder, Icon.ArrowUp, Icon.ArrowDown)

When it comes to the sorting of the gallery items we use the function SortByColumn because t allows us to set the column that we will use to sort by a string or a variable
SortByColumns(

YourDataSource,

SortingColumn,

If(AscendingOrder, Ascending, Descending)

)
Lastly we will handle the main activity for the header set on select of the main icon. Upon clicking on e header, toggle the ascending order variable and update the sorting column variable
Set(

AscendingOrder,

If(

SortingColumn = "ID",

!AscendingOrder,

true

)

);

Set(

SortingColumn,

"ID"

)
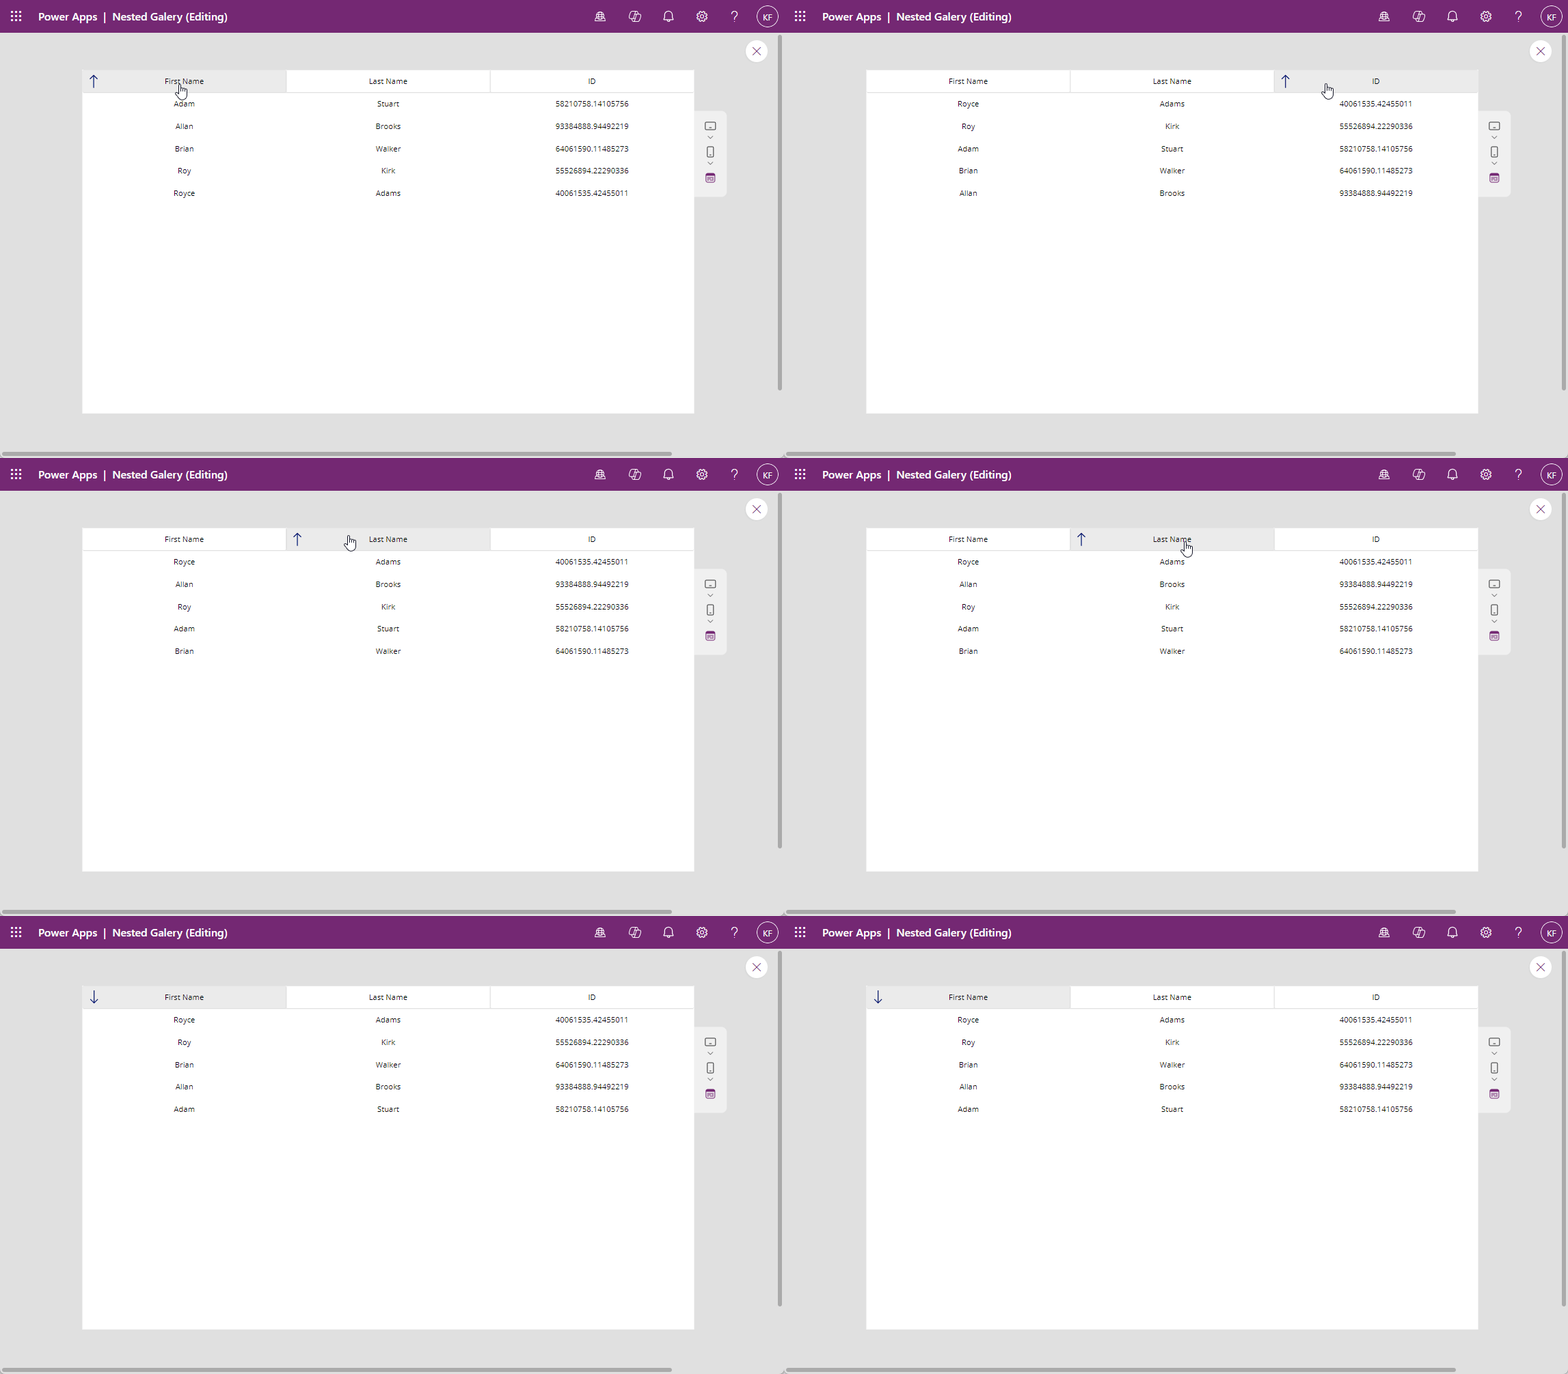
In the end your header functionality should look something like this:

