

Today we will talk about the major components of Power Automate Flows , there are three major components that make Power Automate function, we will dive in and talk about each of these components :
Power Automate consists of these three fundamental components:
1. TRIGGERS
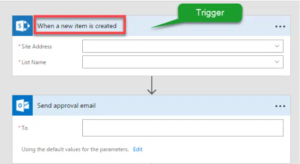
A trigger is something that triggers or starts the workflow. It could be a new file uploaded to a document library, a new item created in the list or an email sent to your Inbox – something that will start (kick-off the workflow). There is always just one trigger per workflow.
There are two types of triggers:
- Automatic trigger is pre-programmed into the workflow based on a certain rule (i.e. new document or item created, email sent, etc.) Automatic Trigger can also be passed from another application, like PowerApps. For example, at a certain point of the data collection using PowerApps app that you created, a workflow is started to carry the item/data through say an approval cycle. In this case, Microsoft Flow will start automatically from within another application
- Manual Trigger is a trigger initiated by a user. Unlike with automatic trigger above, the workflow will only start when initiated manually by the end user (for example, from the Document Library for a selected file). Manual trigger is only supported for certain types of workflows.
How to create a trigger :
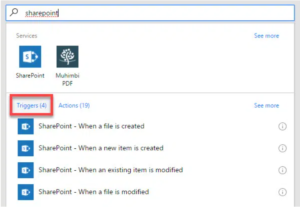
You can’t build a workflow without specifying a trigger first, so you will be forced to fill in the trigger as the very first step in the flow building process. Just choose one that suits your needs from the screen when you create your flow (from scratch). It will be auto-populated for you if you choose to create a flow based on a certain template.
2. ACTIONS
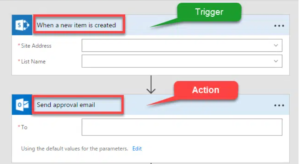
An action is something that occurs as a result of the workflow. Below are some examples of the out of the box actions (there are a lot more but this is just to showcase some possibilities) that exist in Microsoft Flow:
- Send an email
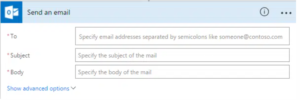
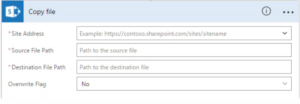
- Copy file
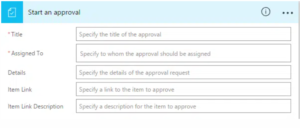
- Start an approval
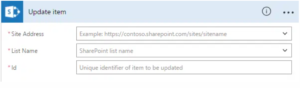
- Update item
You can have as many actions as you wish in the Flow. Essentially, Action is what makes Flow run as it goes through the different steps.
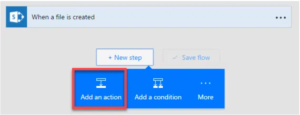
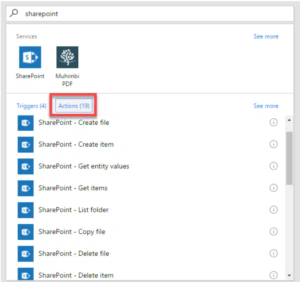
How to create an Action :
As you build your workflow, you will see a New step menu appear on the screen, just click Add an Action and choose the action that suits your needs.
3. CONDITIONS
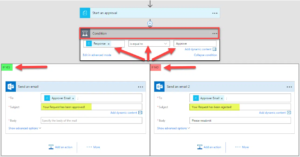
A condition is essentially your “If Statement”. If this happens – do this, if that happens – do something else. A classical example is an approval process. If the user approves an item or a document – send an email with approval, if a user rejects – send an email with rejection. Another example could be based on metadata. For example, if you have a Purchase Order approval process and PO dollar value is less than $10,000 – send it to Finance Manager for an approval and POs > $10,000 – send them to CFO (Chief Financial Officer).
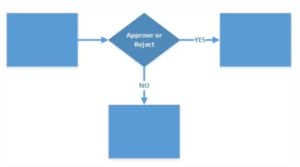
In business process diagrams, this step is represented as a diamond (rhombus) – a universal flowchart symbol for decisions.
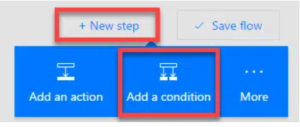
How to add a Condition :
Same as with Actions, as you build your flow, just click on Add a Condition and populate with the logic that is relevant to your particular scenario.
Now that we learned about the main components of Power Automate Flows then let’s create an custom flow to see them in action :
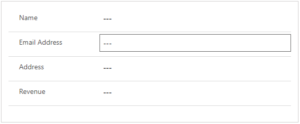
For this example I choose a simple scenario where the user fills a Name field and based on the value of the Name field then the other fields (Email Address, Address, Revenue) get new values .
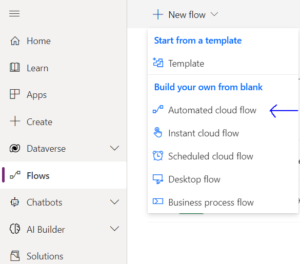
First of let’s create our flow , I’ll use a ‘Automated cloud flow’ for this example (check the first blog to see the differences between flow types) :
After choosing the type of flow we want to use then we choose the type of trigger for our flow :
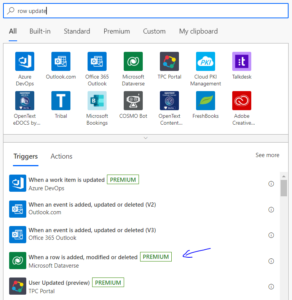
We will choose the trigger above because the trigger we want for the flow is when our Name field gets updated.
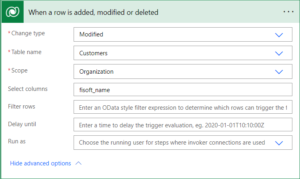
Now it’s time to modify the trigger based on our needs , I’ll explain each of the fields in the pic above :
- Change type = Modified – the change type field is where we tell the trigger on what kind of action to start working , in our case we want it on update (field/row update)
- Table name = Customers – the table where our trigger is located in CRM so in our case Customers
- Scope = Organization – the scope of the flow means what users are able to trigger this flow based on this specific action , in our case organization means that everyone can
- Select columns = fisoft_name – this field is equal to the logical name of the field trigger (Name field) for our Customer table.
Now it’s time to setup our actions that will occur if the flow is triggered , for this example before I do the actions I decided to use a switch just as shown below :
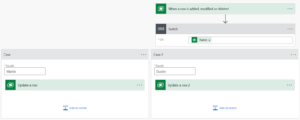
As you can see below the trigger we have the switch , the switch works on the value of Name field (On field = Name) , if the value of the field Name is ‘Martin’ then the switch will go to the first case (on the left) else if the value of the field Name is ‘Dustin’ then the switch goes to the second case (on the right) , and as you can see inside each case we have an ‘Update a row’ action.
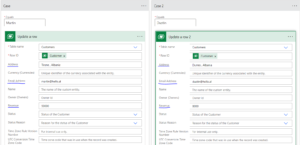
In each switch case we have our actions which in our case are identical except their values , the underlined fields above are the fields we want to update based on the switch case , we will give them static values for the sake of the example but you can also use dynamic values depending on the type of flow you’re building.
If you followed all the steps until now then congrats because the flow is finished , now let’s see it in work :

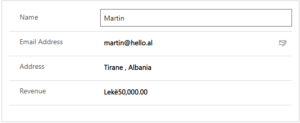
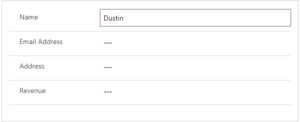
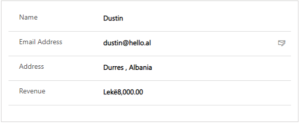
As you can see above the flow works , every time we change the value of the Name field the other fields get populated with the values we specified in the flow.