Welcome everyone, hope you like this post and find this information somehow helpful.
In this post we are going to talk about integrating an HTML page in Dynamics 365 CRM as a web resource and combining it with a JavaScript web resource. The business scenario in this case is about modifying an entity page based on condition through JavaScript and displaying a full screen HTML page which shows a custom message to the user. This can apply in different cases depending on the purpose or the business goal that you are trying to achieve, such as putting an entity in beta stage for initial release, modifying entity access based on team membership, etc. Let us take the second case for this task and use the script to check if the current logged-in user is part of a specific/target team, then give access to an entity page or else show a custom message through the HTML page.

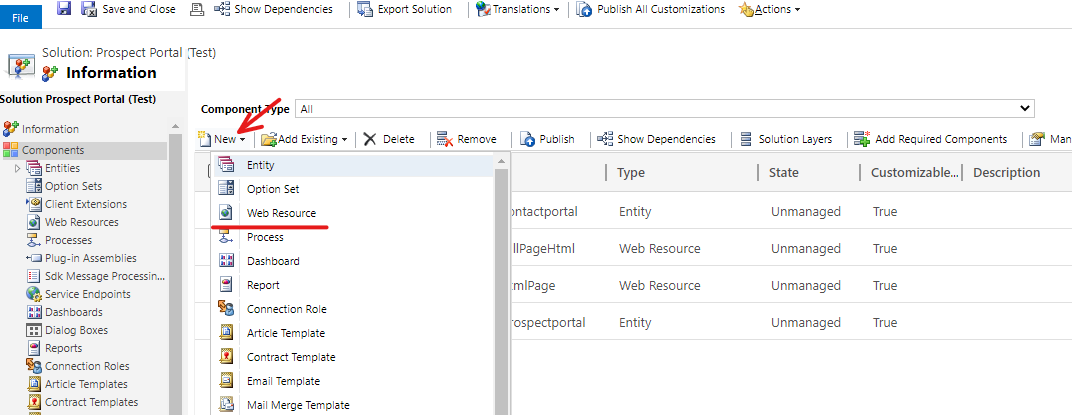
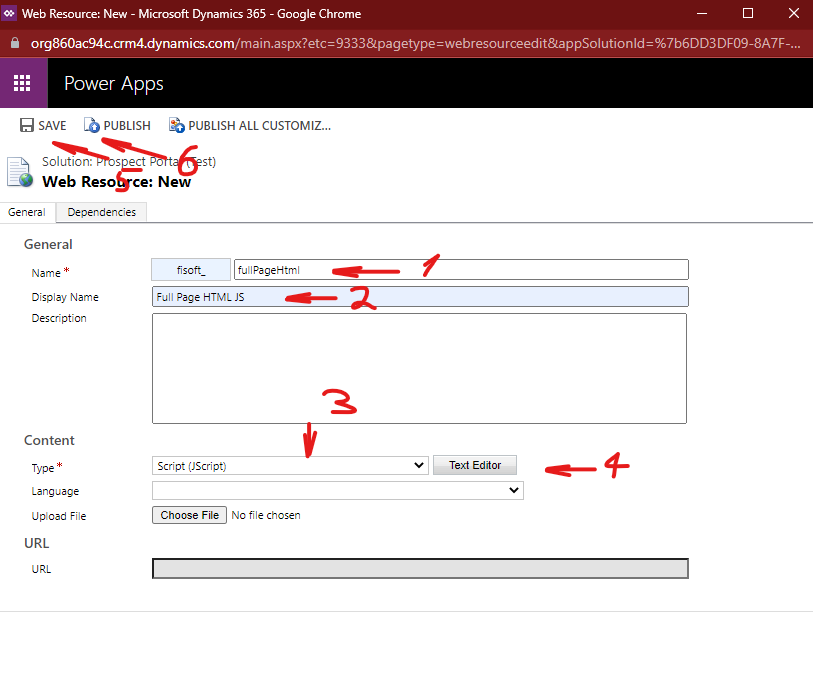
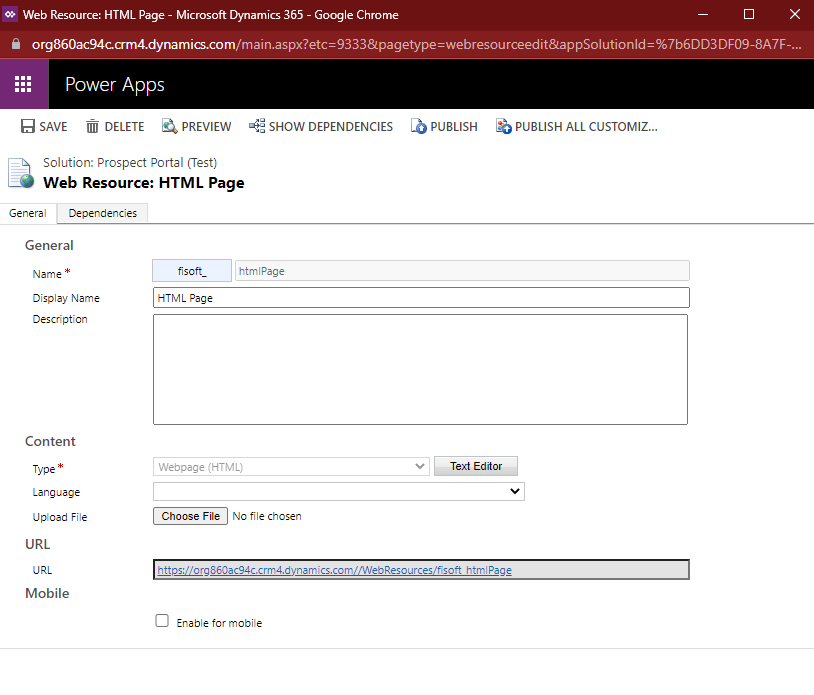
I am going to break down the creation process of both web resources in the steps below:
- Open Visual Studio Code and create a new HTML file.
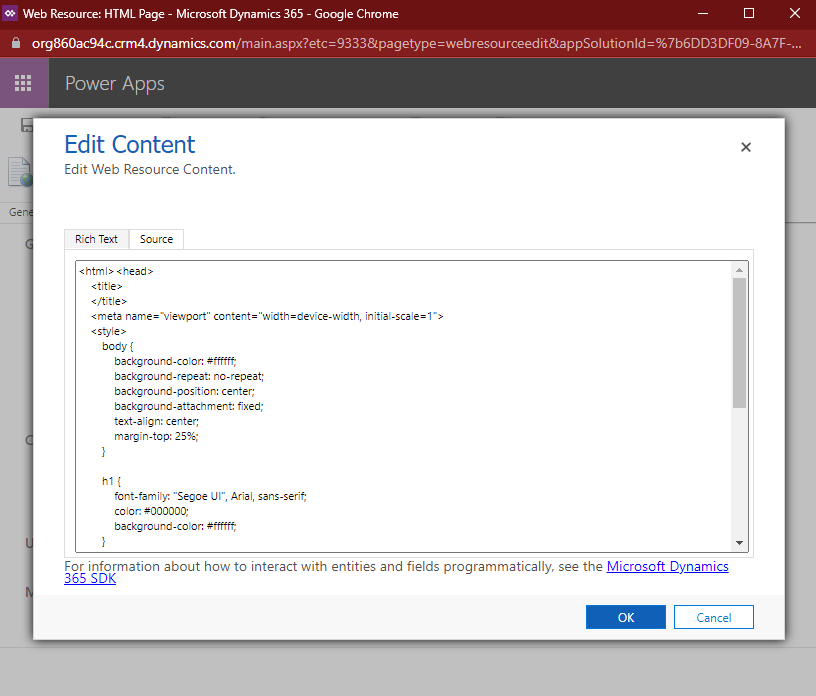
- Copy and paste the code below then save file:
<!DOCTYPE html>
<html>
<head>
<title>
</title>
<meta name="viewport" content="width=device-width, initial-scale=1">
<style>
body {
background-color: #ffffff;
background-repeat: no-repeat;
background-position: center;
background-attachment: fixed;
text-align: center;
margin-top: 25%;
}
h1 {
font-family: "Segoe UI", Arial, sans-serif;
color: #000000;
background-color: #ffffff;
}
p {
font-family: "Segoe UI", Arial, sans-serif;
font-size: 16px;
font-style: normal;
font-weight: normal;
color: #000000;
background-color: #ffffff;
}
</style>
</head>
<body>
<!-- you can edit this part here to show whatever message you would like to on the page -->
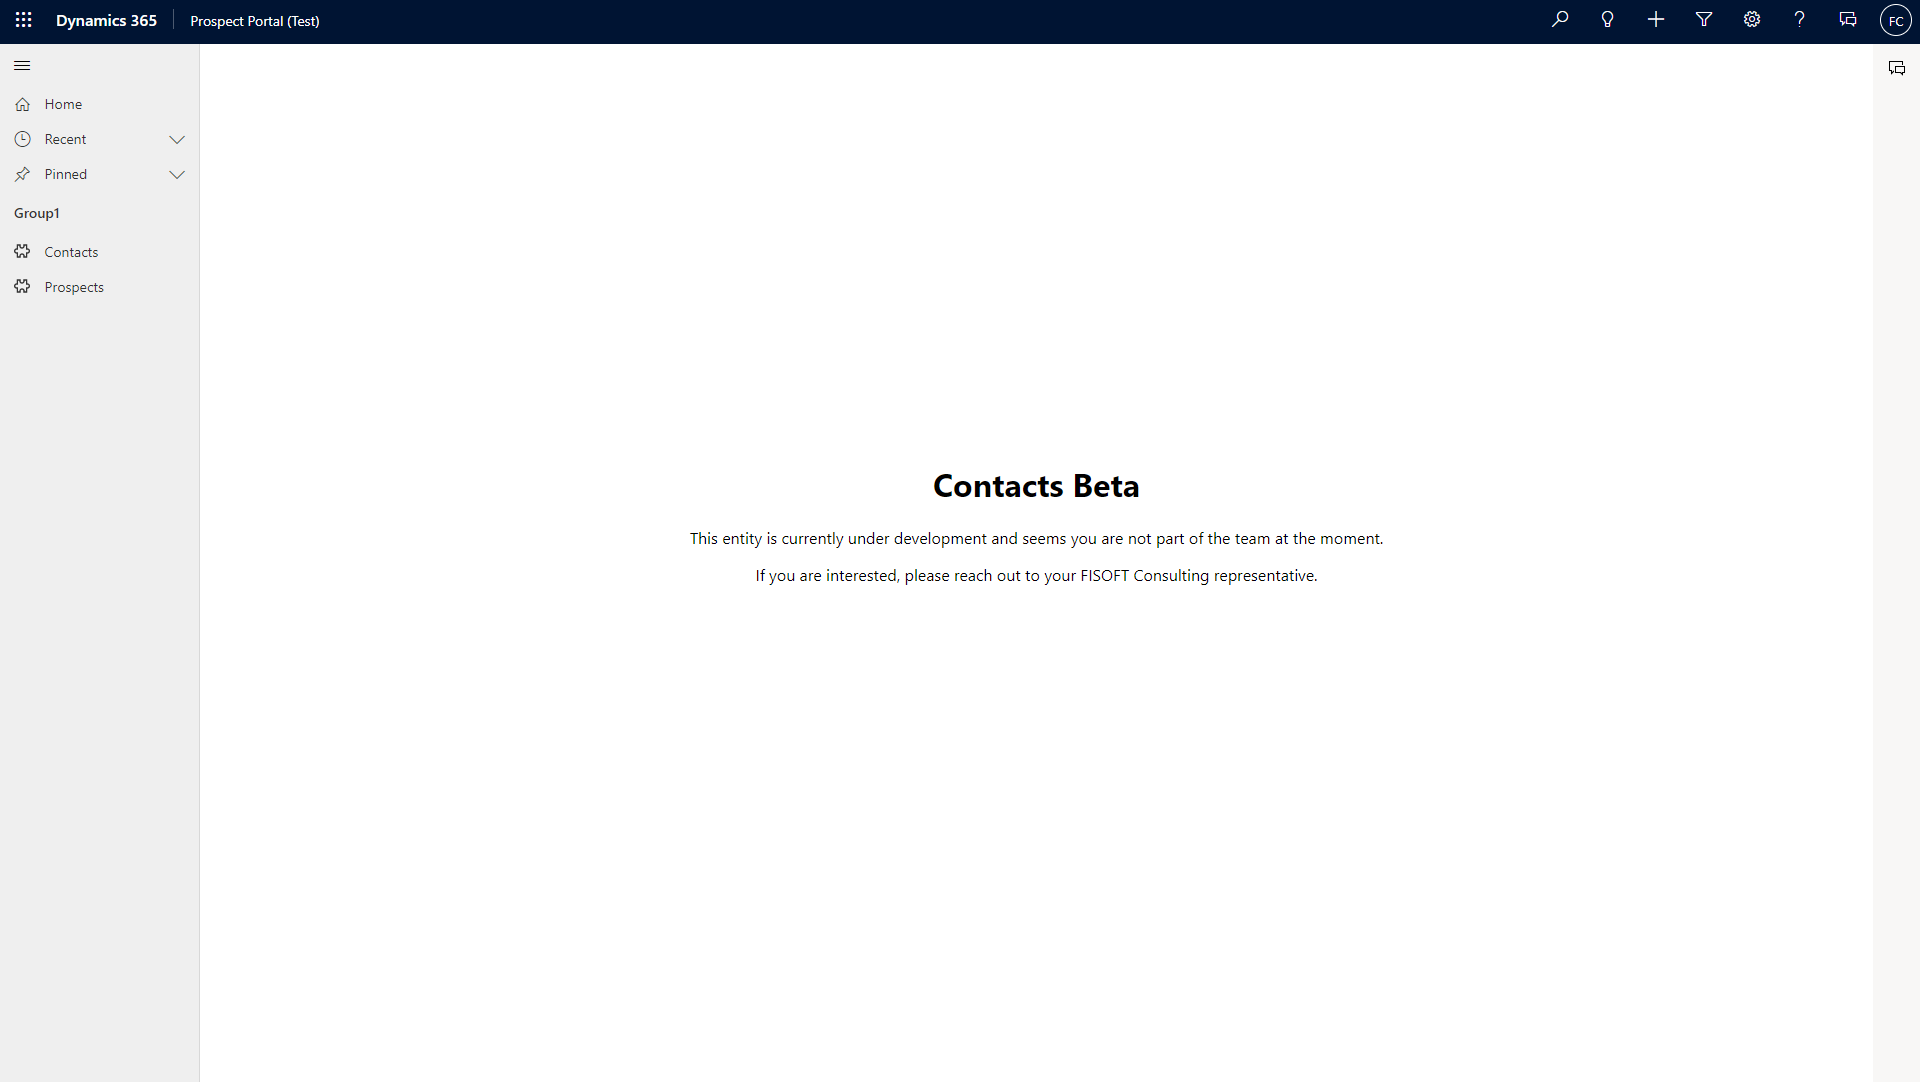
<p><h1>Contacts Beta</h1></p>
<p>This entity is currently under development and seems you are not part of the team at the moment.</p>
<p>If you are interested, please reach out to your FISOFT Consulting representative.</p>
</body>
</html>
This HTML code shows a custom message which is included in the body section and is positioned in the center/middle of the screen.
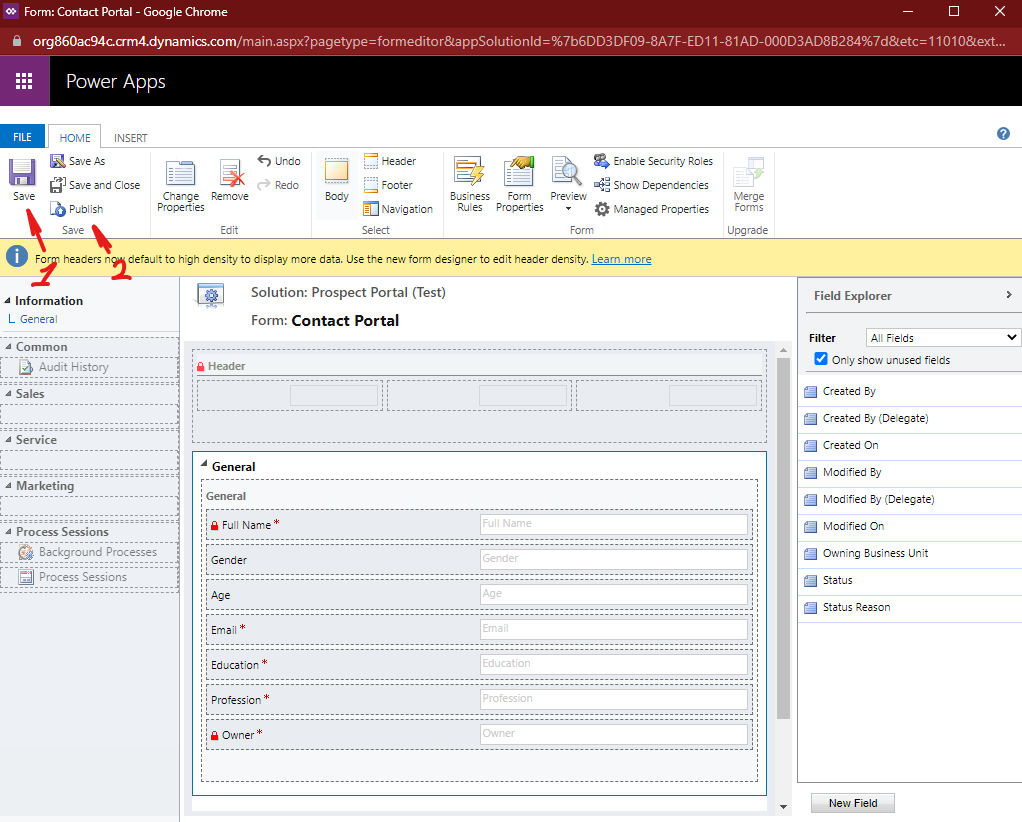
3. Create a new JavaScript file then copy and paste the code below and save file:
function onLoad() {
var myTeamId = null;
var myTeamName = null;
//the user is not part of the team by default until it is checked
let isPartOfTeam = false;
var guid = "[A-z0-9]{8}-[A-z0-9]{4}-[A-z0-9]{4}-[A-z0-9]{4}-[A-z0-9]{12}";
var serverUrl = Xrm.Page.context.getClientUrl();
var userId = Xrm.Page.context.getUserId();
userId = userId.match(guid);
userId = userId.input;
//retrieve teamIds of the teams current user belongs to
var userTeamsQuery = "TeamMembershipSet?$select=TeamId&$filter=SystemUserId eq guid'" + userId + "'";
var userTeams = makeRequest(userTeamsQuery);
var teamQuery = null;
var teams = null;
if (userTeams !== null) {
for (var i = 0; i < userTeams.length; i++) {
userTeams[i] = userTeams[i].TeamId;
var teamId = "{" + userTeams[i] + "}";
//retrieve name and teamIds of the teams via given teamId that we already have above
teamQuery = "TeamSet?$select=Name, TeamId&$filter=TeamId eq guid'" + teamId + "'";
teams = makeRequest(teamQuery);
myTeamId = teamId;
if (teams !== null && teams.length > 0) {
myTeamName = teams[0].Name;
//valuating the isPartOfTeam variable as true if user is part of target team
if (myTeamName == "Team 1") {
isPartOfTeam = true;
break;
}
}
}
//condition to check if user is not part of target team and opening the HTML web resource page
if (isPartOfTeam == false) {
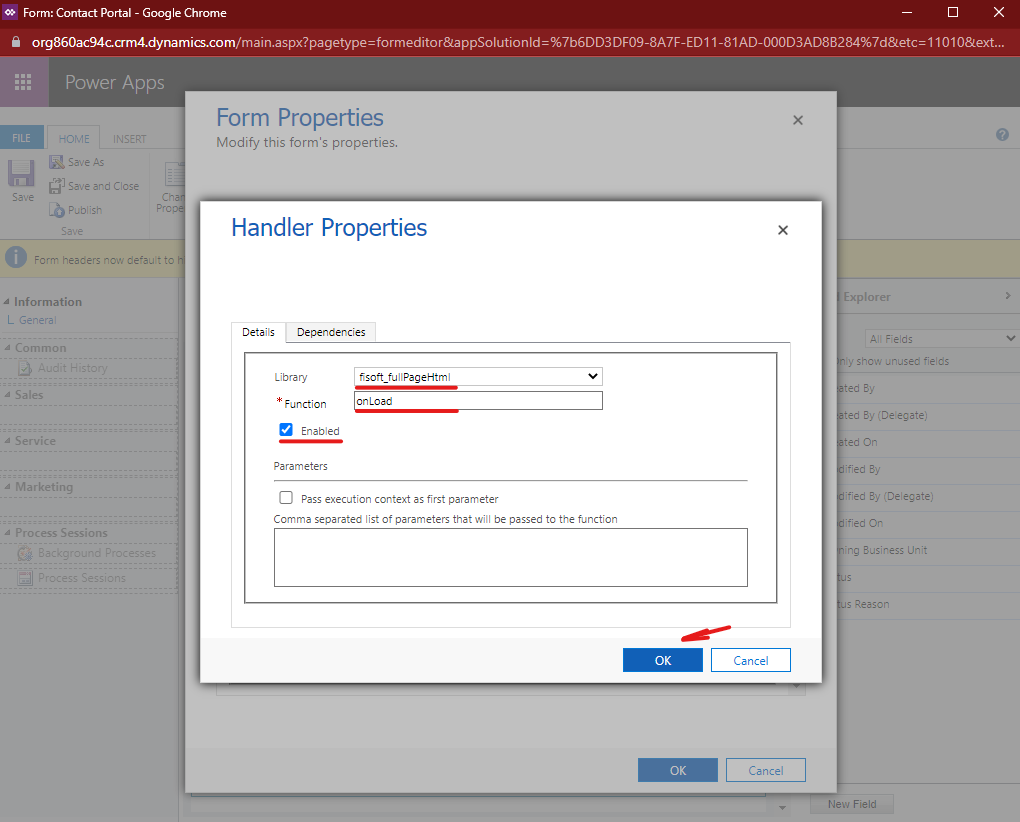
var pageParameters = {
pageType: "webresource", //the HTML page is a web resource type in this case
webresourceName: "fisoft_htmlPage", //logical name of the HTML web resource you would like to open
};
var navigationOptions = {
target: 1, //value 1 to open the targeted web resource in fullscreen
};
//Xrm method that executes the web resource by taking as parameters the variables assigned above
Xrm.Navigation.navigateTo(pageParameters, navigationOptions);
}
}
}
function getRequestObject() {
if (window.XMLHttpRequest) {
return new window.XMLHttpRequest;
} else {
try {
return new ActiveXObject("MSXML2.XMLHTTP.3.0");
} catch (ex) {
return null;
}
}
}
function makeRequest(query) {
var serverUrl = Xrm.Page.context.getClientUrl();
var oDataEndpointUrl = serverUrl + "/XRMServices/2011/OrganizationData.svc/";
oDataEndpointUrl += query;
var service = getRequestObject();
if (service != null) {
service.open("GET", oDataEndpointUrl, false);
service.setRequestHeader("X-Requested-With", "XMLHttpRequest");
service.setRequestHeader("Accept", "application/json, text/javascript, */*");
service.send(null);
var retrieved = JSON.parse(service.responseText).d;
var results = new Array();
for (var i = 0; i < retrieved.results.length; i++) {
results.push(retrieved.results[i]);
}
return results;
}
return null;
}
This script consists of onLoad, getRequestObject and makeRequest functions. What it basically does is that retrieves the teams in which the current user is a part of and then based on condition it will execute or not the HTML web resource created in the previous step.
I will get to this in more detail for better understanding by breaking down the onLoad() function of this script:
Variable “isPartOfTeam” is false by default, because it is convenient to keep it that way until it is checked. The variable “userTeamsQuery” stores a query which is executed by makeRequest() function. It filters teams by comparing the system user ID and the current user ID, so it extracts only the teams in which is a member of.
Then there is a for loop which retrieves team IDs and the name of each team that got filtered, then a nested if condition where is stated the name of the target team:
//valuating the isPartOfTeam variable as true if user is part of target team
                if (myTeamName == "Team 1") {
                    isPartOfTeam = true;
                    break;
                }
The condition I am talking about is:
//condition to check if user is not part of target team and opening the HTML web resource page
        if (isPartOfTeam == false) {

            var pageParameters = {
                pageType: "webresource", //the HTML page is a web resource type in this case
                webresourceName: "fisoft_htmlPage", //logical name of the HTML web resource you would like to open
            };
            var navigationOptions = {
                target: 1, //value 1 to open the targeted web resource in fullscreen
            };
            //Xrm method that executes the web resource by taking as parameters the variables assigned above
            Xrm.Navigation.navigateTo(pageParameters, navigationOptions);
        }