
In today’s blog we will see how to turn on Auditing for an entity and retrieve the auditing data by using a C# console app where we can use this data for different reasons like reports or data manipulation.
To do this development, we will separate the work into 2 steps :
1. Activate Auditing for the entity we want to be audited.
2. Create the C# console app which will show the data retrieved from auditing in a table format.
First off, what is auditing in CRM ?
The Dynamics 365 auditing feature logs changes that are made to customer records and user access so you can review the activity later. So basically if the auditing feature is turned on then if we go to the records of that entity and we do changes on the different fields that entity has then we can go to auditing and there we can see everything from when the fields values where changes to who changed them, what their old and new values are ,etc.
1. Activate Auditing for the entity we want to be audited.
So for the first step we need to activate auditing in settings for all the entities we want, this can be done when creating the entity or after. To activate auditing follow the steps below:
First, go to ‘advanced settings’ and either open the ‘default solution’ or the ‘solutions’ and in there you need to find the entity you will want to activate auditing.
(For this example I’ll be using an entity I have showcased in another post before, the fisoft_test entity)
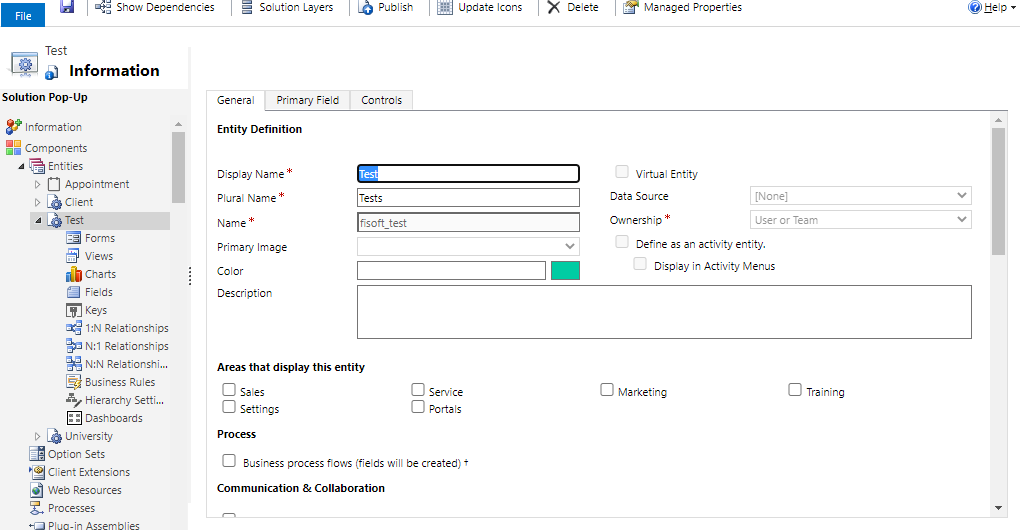
Above we can see the entity that I will be using for this example, if you are on this page then scroll down as shown below :
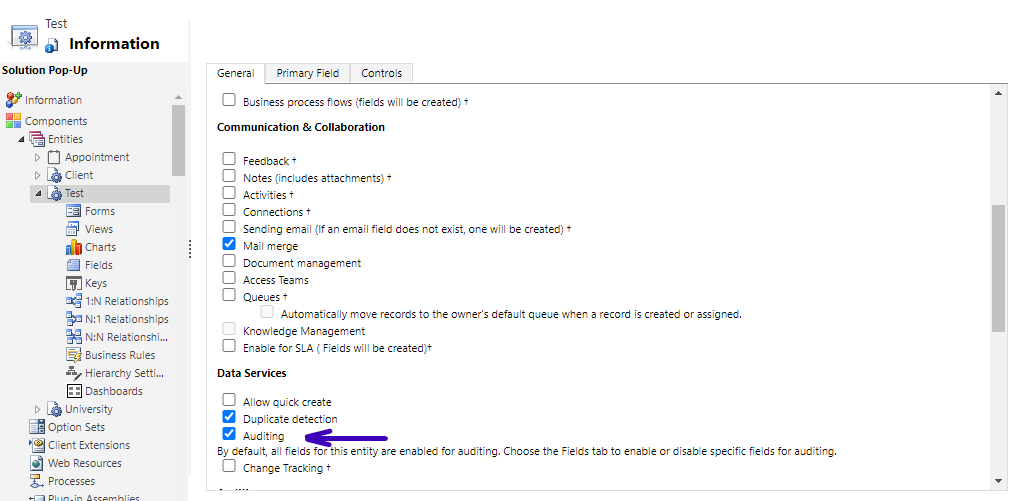
Make sure to check the Auditing box as seen in the picture above, and with this the auditing feature is activated for this entity.
Now let’s go to the environment, and change some field values and see what happens :
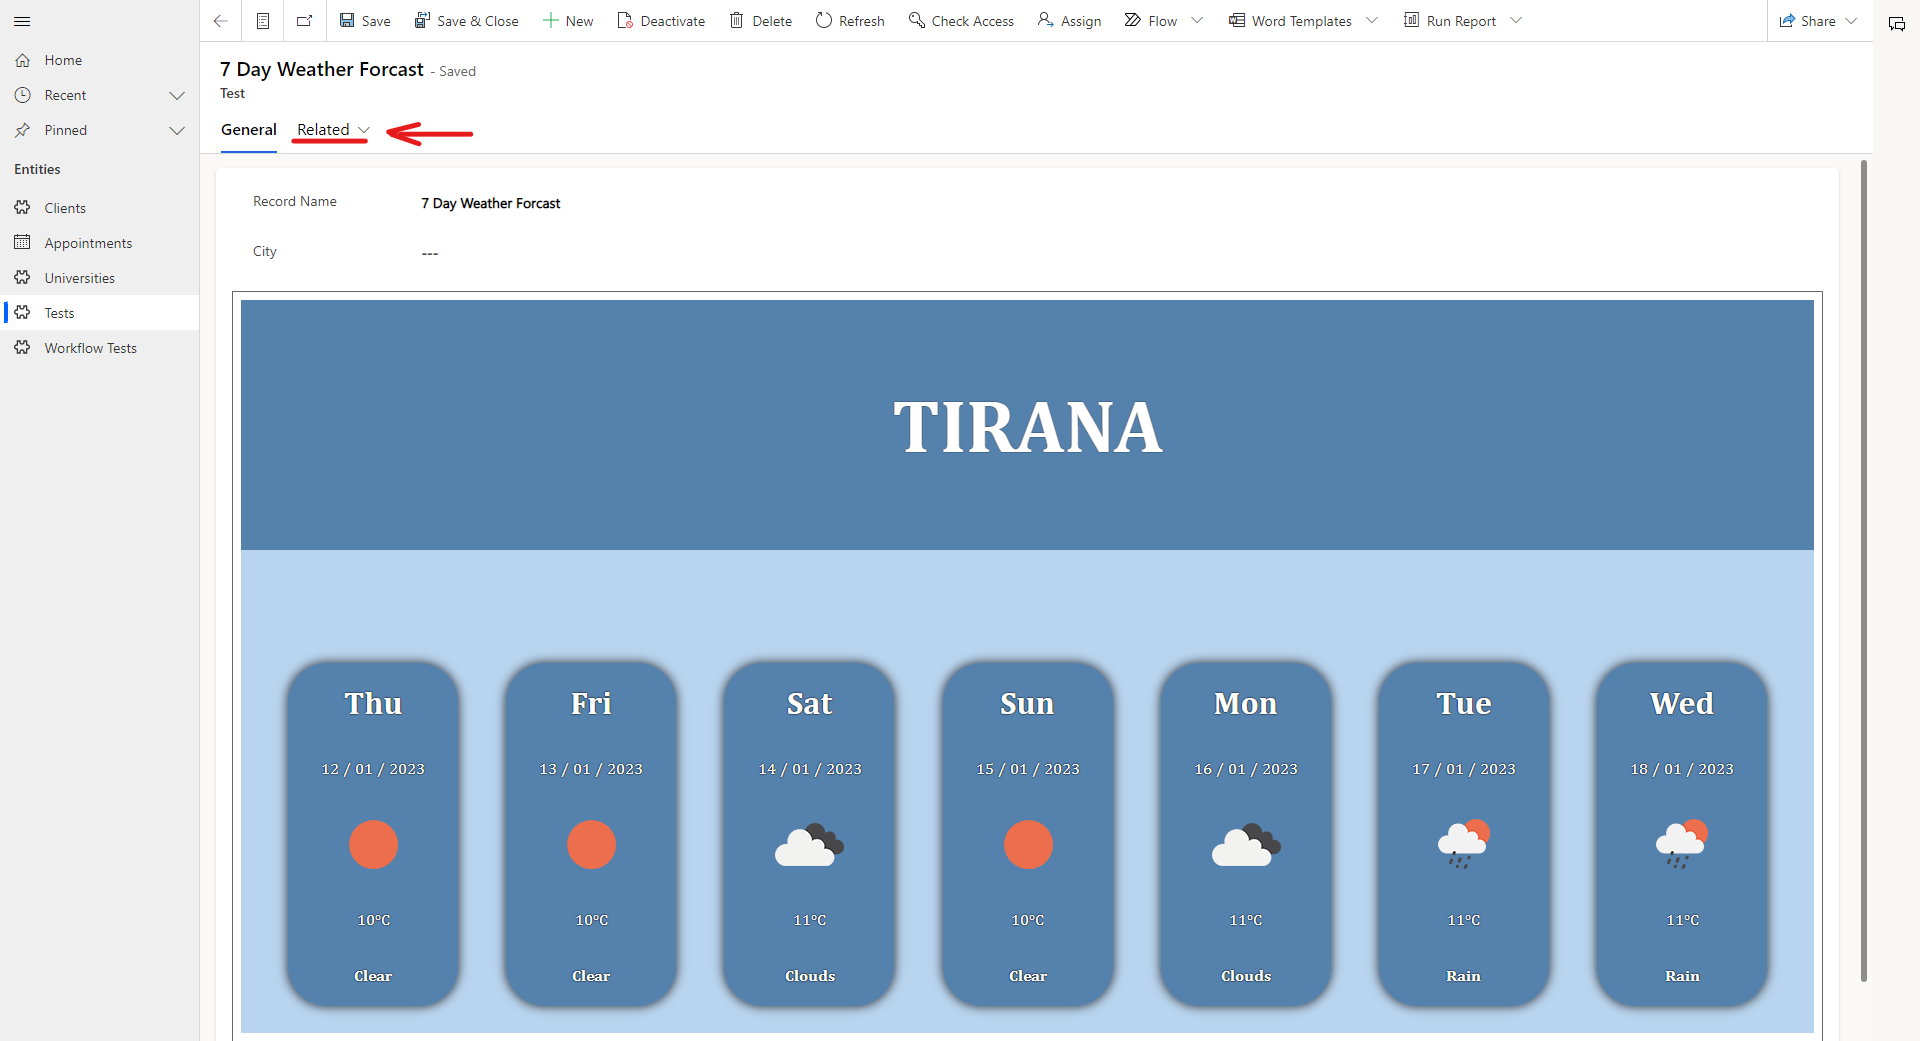
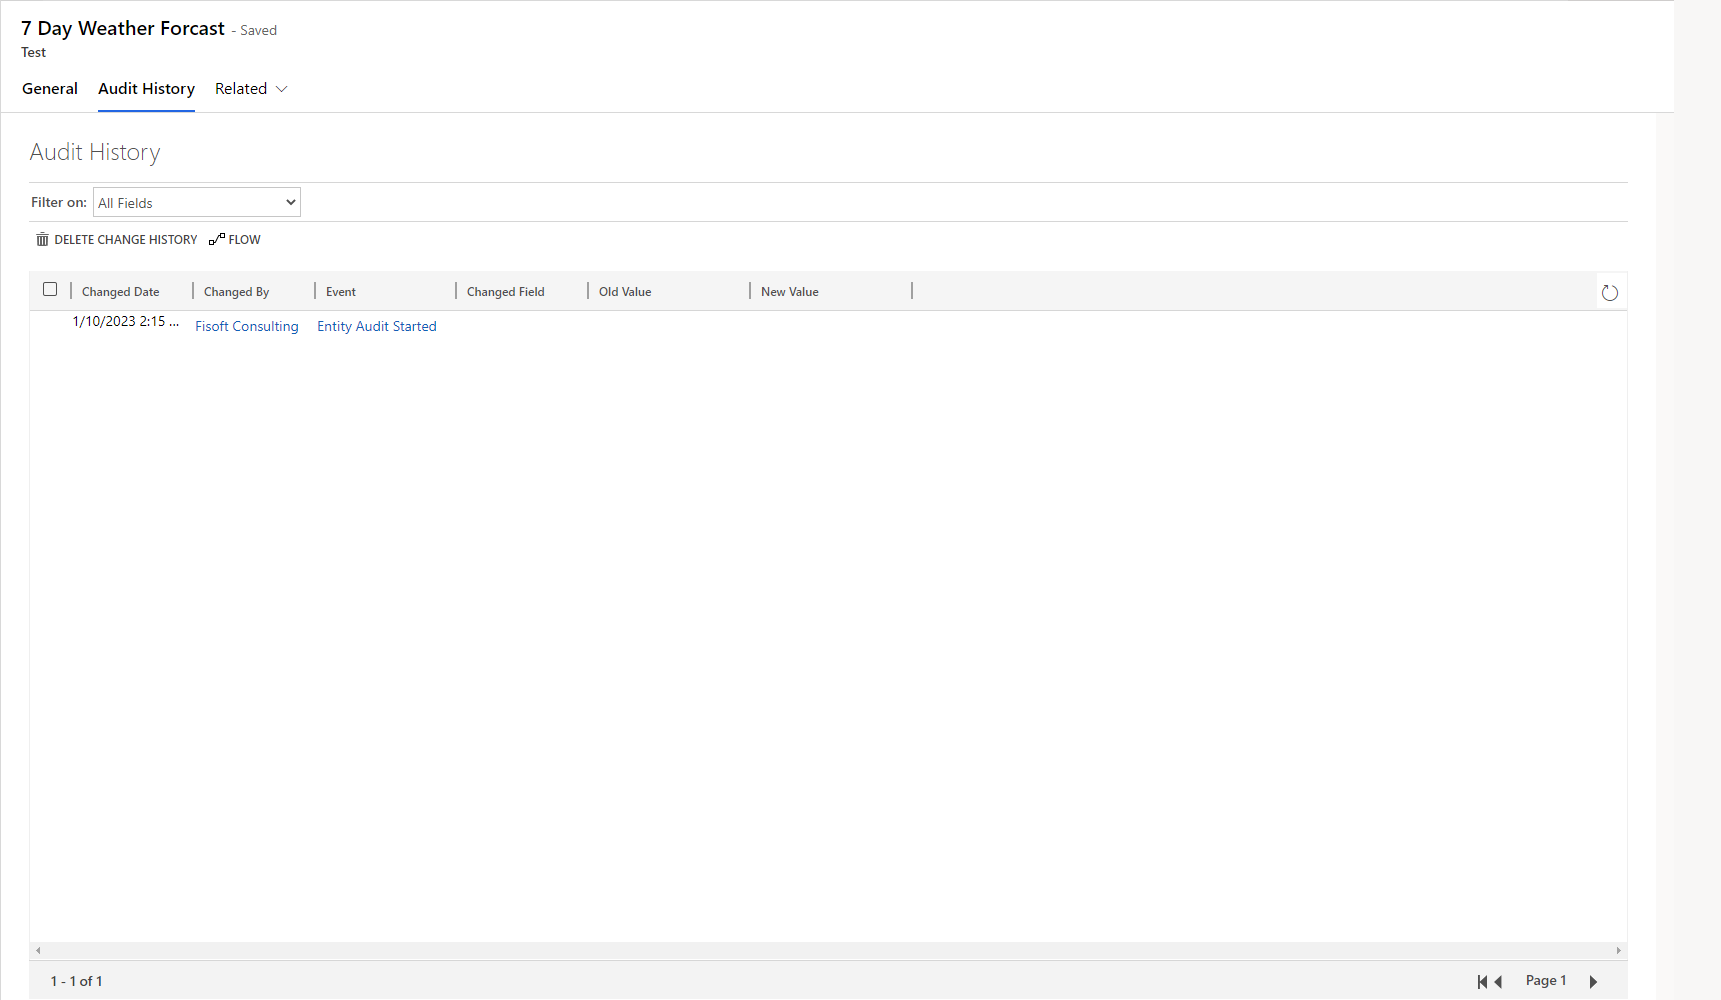
After going to the entity we just activated auditing for, then up top on the tabs we click on ‘Related’ which is a drop down and somewhere in that drop down we will find ‘Audit History’:
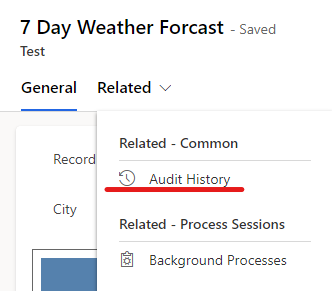
After clicking on it, next to the ‘General’ tab now will show the ‘Audit History’ tab :
Now let’s change the fields a few times to see what will happen:
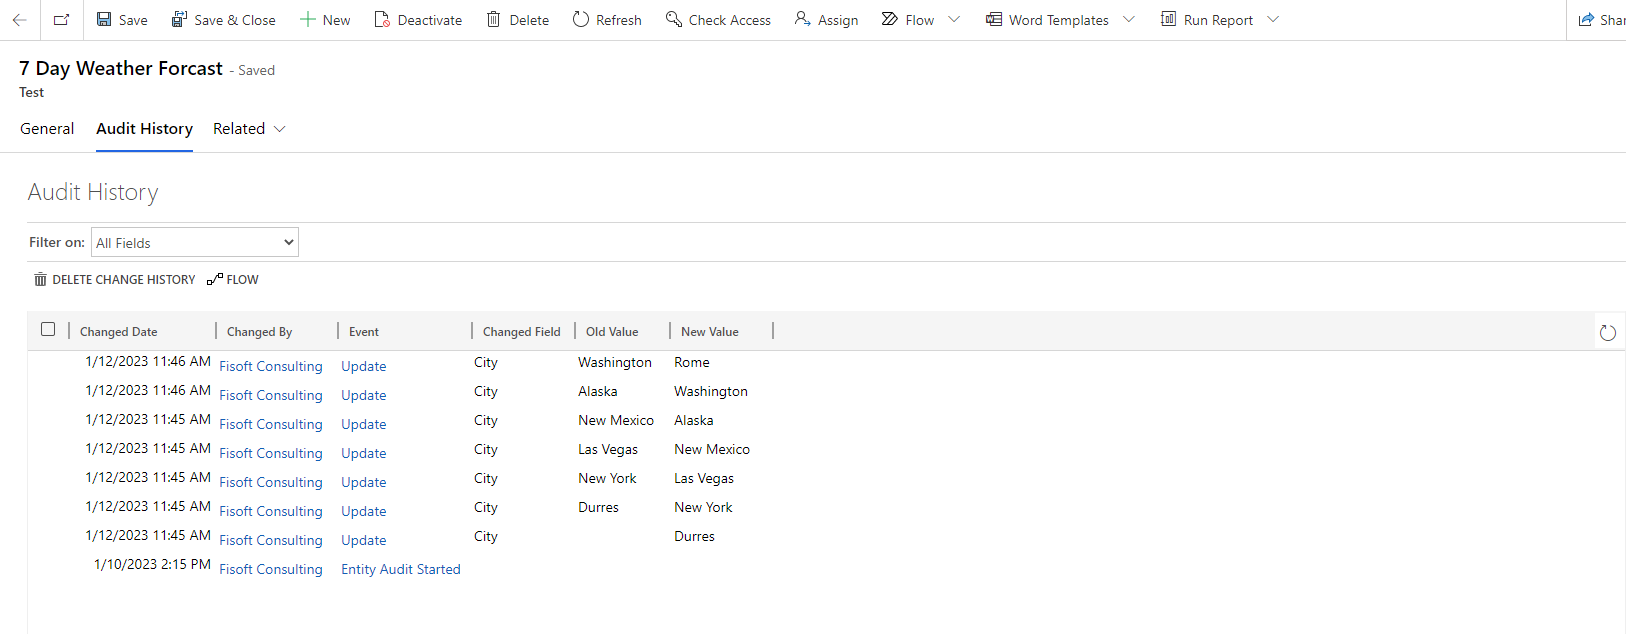
So as seen above by using the auditing feature we can see when a field was modified , the old and the new values etc. So the value of the ‘City’ field went from empty to Durres, then from Durres to New York etc. This feature is great because if you have sensitive data in a certain entity you can see everything here if there has been any changes.
2. Create the C# console app which will show the data retrieved from auditing in a table format.
Now after generating some auditing data let’s go and create our C# console app where we can retrieve this data and build reports or other things with it, for the example we will just print it to see how the data is retrieved.
First let’s see how to create a C# console app step by step in case any of you doesn’t know how:
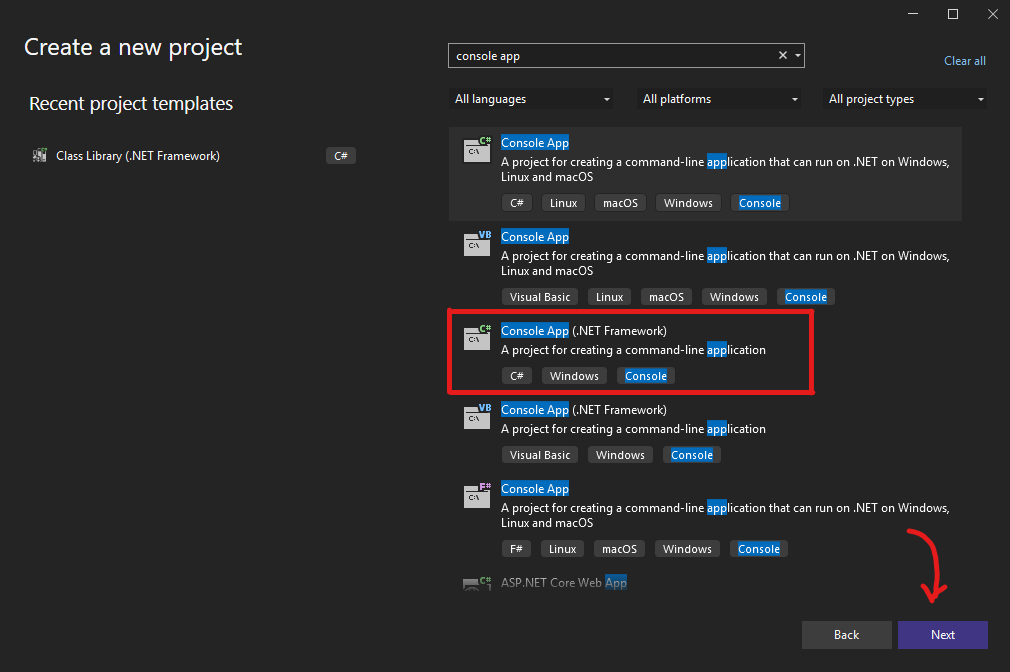
After selecting ‘Console App (.NET Framework)’ click on ‘Next’ :
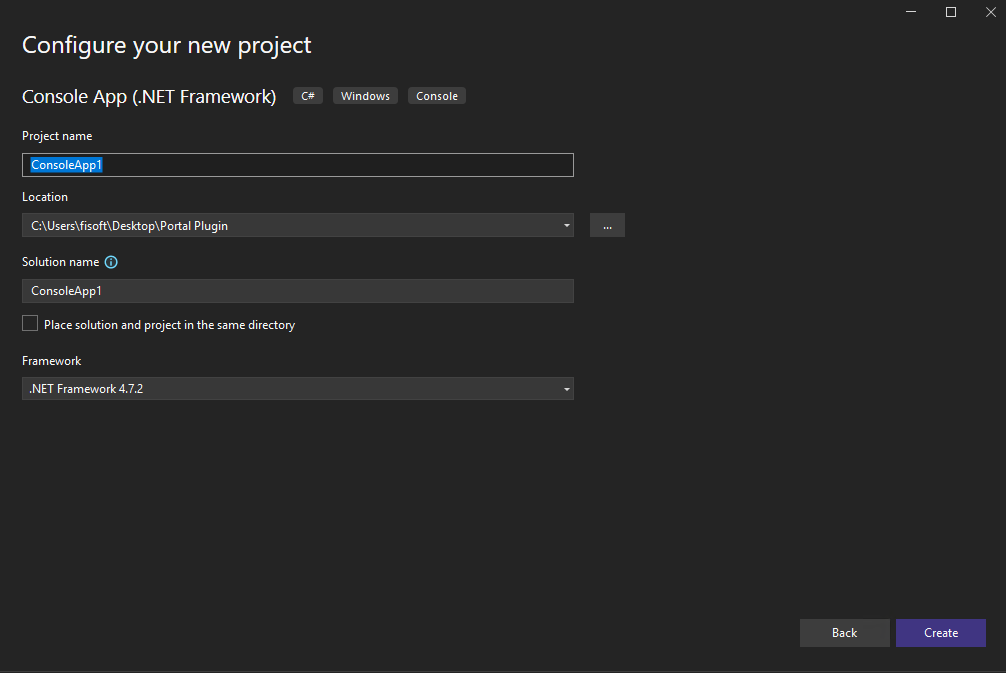
On this pop-up you can now create the project and save it where you want and now we have to add the code below:
  using System;
  using Microsoft.Crm.Sdk.Messages;
  using Microsoft.Xrm.Sdk;
  using Microsoft.Xrm.Tooling.Connector;

  namespace Auditing
  {
      internal class Program
      {
          static void Main(string[] args)
          {
              try
              {
                 //The connectionString is used for us to connect to CRM so it allows us to retrieve or send or manipulate data.
                //Change this variable with your personal info when you use the code
                 string connectionString = @"AuthType=OAuth;
                                           Username=crm_email;
                                           Password=******;
                                           Url=https://org....34as.crm4.dynamics.com/;
                                           AppId=51f81489-12ee-4a9e-aaae-a2591f45987d;
                                           RedirectUri=app://58145B91-0C36-4500-8554-080854F2AC97";
                 CrmServiceClient service = new CrmServiceClient(connectionString);


                 //Create a new RetrieveAttributeChangeHistoryRequest
                 RetrieveAttributeChangeHistoryRequest req = new RetrieveAttributeChangeHistoryRequest();

                 //Set the target Entity
                 req.Target = new EntityReference("fisoft_test", new Guid("02838ba5-8870-ed11-9561-002248999c19"));

                 //Set the attribute(field logical name) you want to retrieve specifically
                 req.AttributeLogicalName = "fisoft_cityname";

                 //Execute the request against the OrgService
                 RetrieveAttributeChangeHistoryResponse resp = (RetrieveAttributeChangeHistoryResponse)service.Execute(req);

                 //save the response audit details collection data in the details variable
                 AuditDetailCollection details = resp.AuditDetailCollection;

                 //This console.writeline will print table headers
                 Console.WriteLine("| Created On | User Name | Operation | Action | Old Value | New Value|");
                 //Iterate through the AuditDetails
                 foreach (var detail in details.AuditDetails)
                 {
                    if (detail.GetType() == typeof(AttributeAuditDetail))
                    {
                       AttributeAuditDetail attributeDetail = (AttributeAuditDetail)detail;
                       //save the data on different variables
                       var createdOn = attributeDetail.AuditRecord.GetAttributeValue<DateTime>("createdon");
                       var userName = attributeDetail.AuditRecord.GetAttributeValue<EntityReference>("userid").Name;
                       var operation = attributeDetail.AuditRecord.FormattedValues["operation"];
                       var action = attributeDetail.AuditRecord.FormattedValues["action"];
                       var oldValue = attributeDetail.OldValue["fisoft_cityname"].ToString();
                       var newValue = attributeDetail.NewValue["fisoft_cityname"].ToString();

                       //print the values retireved earlier in table format
                       Console.WriteLine($"|{createdOn} | {userName} | {operation} | {action} | {oldValue} | {newValue}|");

                       //Here you can use the old value and new value in the Business Logic
                   }
               }
               Console.ReadLine();

           }
           catch (ArgumentException e)
           {
              Console.WriteLine("Error. \nReason {0}", e.Message);
           }
        }
     }
  }
Now keep in mind you need to change a few things if you use the code above, the ‘connectionstring’ needs to be changed to the values of your CRM environment else the code won’t work. You also need to change all the other fields in bold, like the entity, GUID of the record you want to retrieve data for and the field logical name.
Now if we run the console log let’s see what will be printed on the screen:
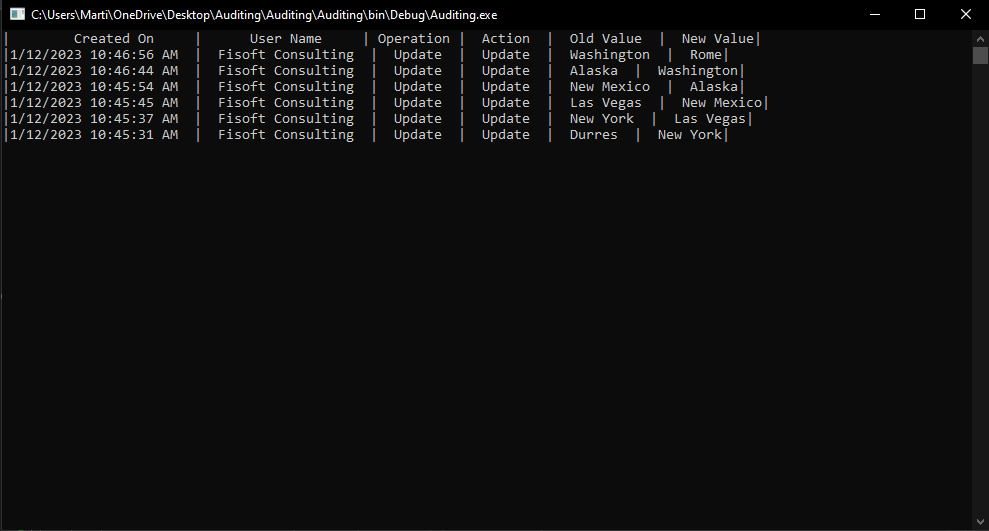
And as we can see the data retrieved and printed is the same as the screenshot shown above earlier. Now feel free to modify the code and use this data however you like.
Thank you for reading 🙂